Yes, you can easily import point data (such as coordinates for a center point) from a CSV (Comma Separated Values) file into QGIS.
The specific tool in QGIS for this task is the “Add Delimited Text Layer” function.
Importing Point Data from CSV
The process requires your CSV file to have at least two columns containing the coordinates (Longitude/X and Latitude/Y).
Step 1: Prepare Your CSV File
Ensure your CSV file is correctly formatted. The headers must clearly distinguish the coordinate fields.
| ID | Longitude (X) | Latitude (Y) |
| 1 | 139.752778 | 35.684444 |
| 2 | 139.691700 | 35.689500 |
Step 2: Use the “Add Delimited Text Layer” Tool
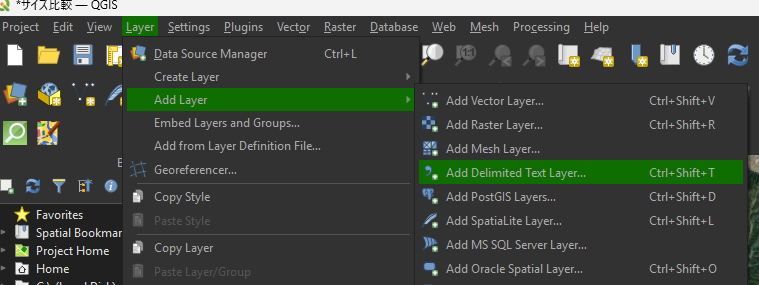
- Go to the Layer menu $\rightarrow$ Add Layer $\rightarrow$ Add Delimited Text Layer…
- In the dialog box that appears:
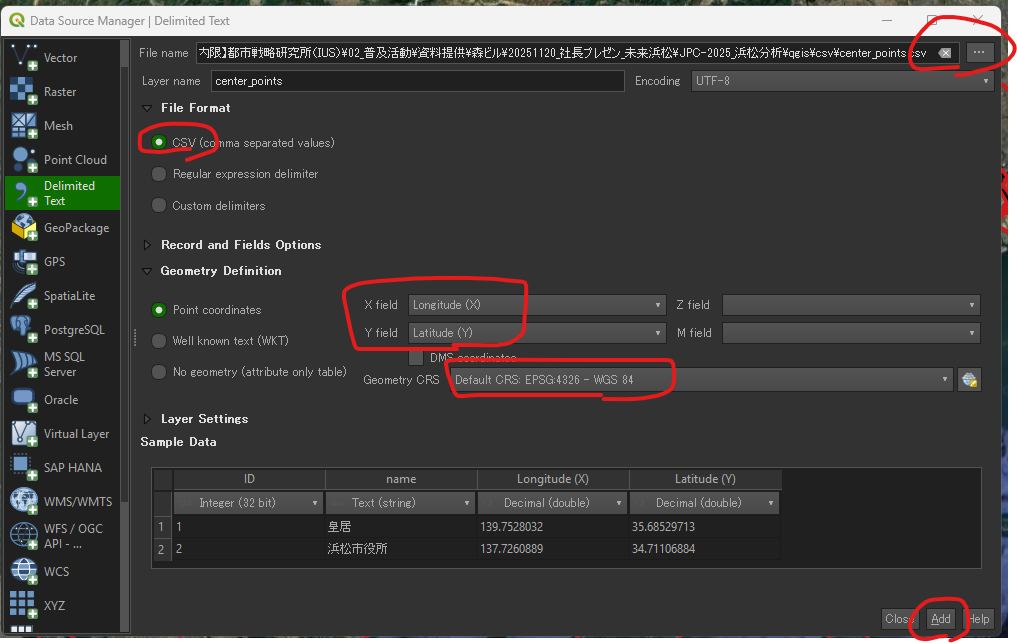
- File Name: Browse to and select your
.csvfile. - Record and Fields Options: Ensure the correct delimiter (usually Comma) is detected.
- Geometry Definition: Select Point coordinates.
- X field: Select the column header that contains the Longitude or Eastings value (e.g.,
Longitude (X)). - Y field: Select the column header that contains the Latitude or Northings value (e.g.,
Latitude (Y)).
- X field: Select the column header that contains the Longitude or Eastings value (e.g.,
- Geometry CRS (Coordinate Reference System):
- If your coordinates are standard Latitude and Longitude, set this to
EPSG:4326 - WGS 84. - If your coordinates are in a projected system (meters/feet), select the appropriate CRS.
- If your coordinates are standard Latitude and Longitude, set this to
- File Name: Browse to and select your
- Click Add.
円(5km (5000m))を描く
一旦、座標系(CRS)を変更(4326->3857)してから、円を描いた。degree単位をkmに変更するため。
Drawing 5km Circles (Buffers) Around Imported Points
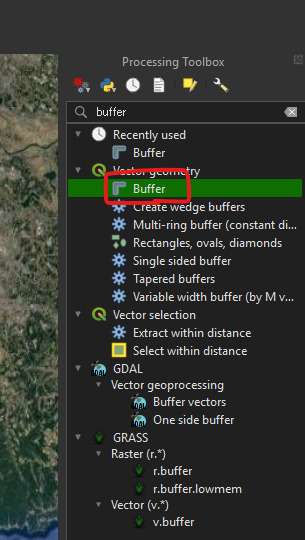
Step 1: Open the Buffer Tool
- Go to the Processing menu $\rightarrow$ Toolbox.
- In the search bar of the Processing Toolbox, type “Buffer“.
- Double-click on the Buffer tool (found under Vector Geometry).
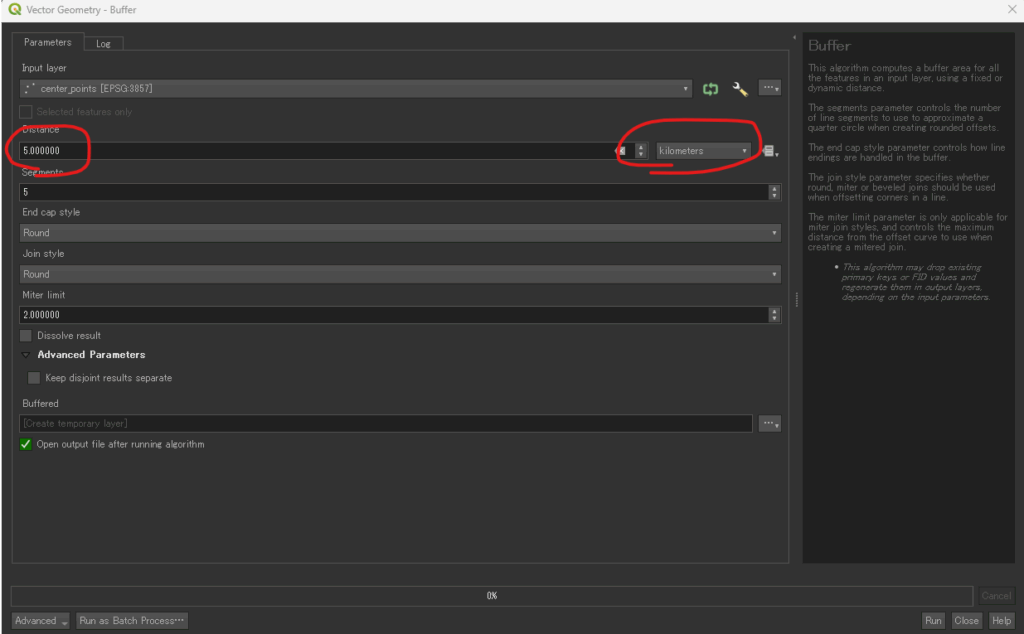
Step 2: Configure the Buffer Parameters
In the Buffer dialog box, set the parameters as follows to ensure accurate 5km circles:
| Parameter | Setting | Notes |
| Input layer | Select the name of the layer you imported from the CSV file (e.g., center_point). | This is the layer containing all your center points. |
| Distance | Enter the number: 5 | This is the radius value. |
| Distance unit | Select: Kilometers | Crucial: Setting the unit here tells QGIS exactly how far to calculate the buffer. |
| Segments | 5 (Default) or a higher number (e.g., 10 or 15) | This controls the smoothness of the circle’s edge. A higher number yields a smoother circle. |
| Dissolve result | Do not dissolve buffers (Uncheck/Default) | Unless you want overlapping 5km circles to merge into one single area, keep this unchecked. |
| Buffered | Click the … button and choose Save to File... | Give the new layer a meaningful name (e.g., 5km_service_areas.gpkg). |
Step 3: Run the Tool and View Results
- Click the Run button.
- QGIS will process the input layer, internally use an appropriate distance-preserving Coordinate Reference System (CRS) for accurate calculation, and generate a new polygon layer containing all the 5km circles.
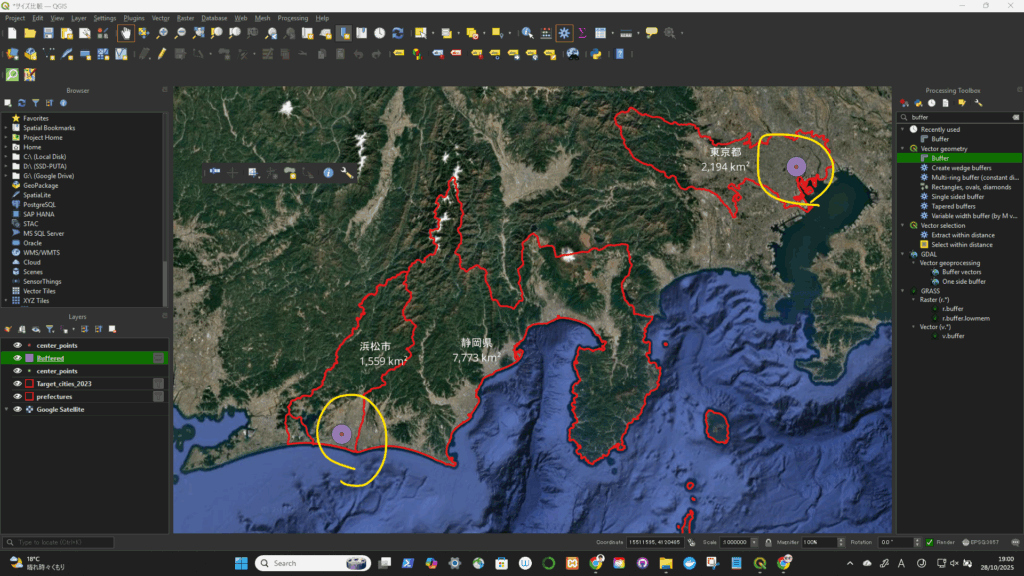
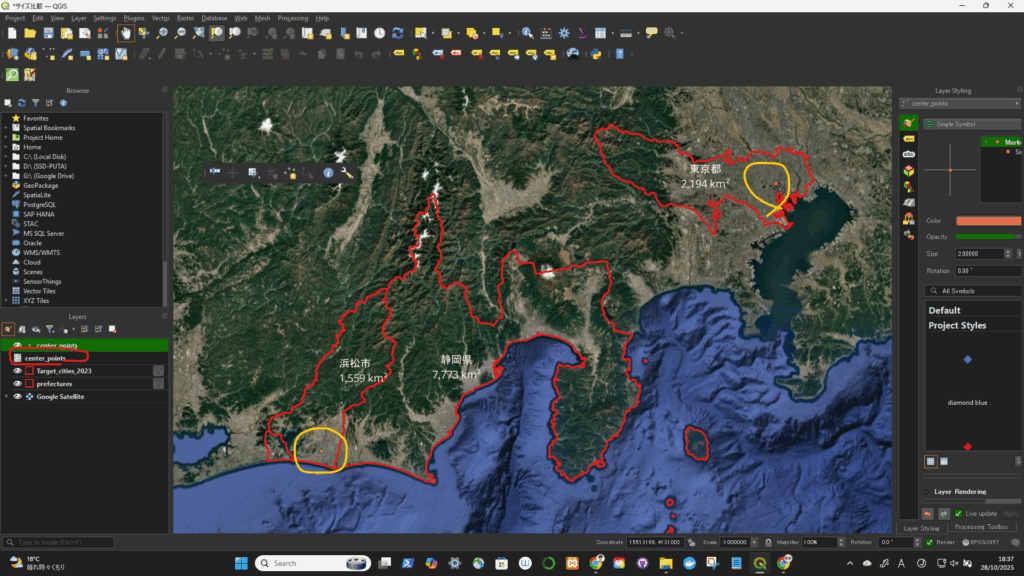
The new layer will appear on your map canvas, showing a perfect 5km radius circle around every point you imported from the CSV file.
円が描けた!